Guide to Hackergotchi!
A hackergotchi is a picture of a writer used as an avatar to identify the author of a given web feed in blog aggregators.
The term hackergotchi originated when the fashion of blog aggregators hit the hacker community, hence the “hacker” part.
Jakub Steiner, a GNOME artist, had created several whole body cutouts that originally appeared on the Art.GNOME.org website. A couple of years later, Jeff Waugh launched Planet GNOME[1], a blog aggregator of GNOME programmers and contributors. Luke Stroven suggested that Jeff use the images created by Steiner with posts by those writers. Stroven then created a bunch of images that depicted the heads of people on Planet GNOME. Waugh coined the term hackergotchi after seeing the collection of heads Stroven created.[citation needed]
The “gotchi” part seems to be a reference to the Tamagotchi toy.
– Wikipedia
Now lets get our hands dirty ( Muahahahahah ):
The basic concept is to delete everything in your picture except your face and before that you need to add a transparent layer at the back of your picture . This tutorial is focusing on GIMP but other softwares can also be use to do the same.
STEP 1 : Open GIMP
STEP 2 : Now go to FILE and OPEN your image from where it is
File–> Open
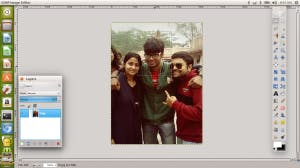
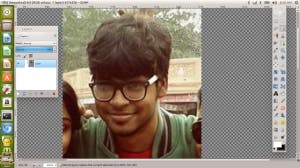
STEP 3 : Once you do that you will have your image like this :
STEP 4 : Select your Face using the rectangle selecting tool :
selecting your face
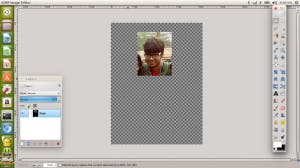
STEP 5 : Left click on the selected area , go to layers and then click on crop to selection.
Left click on area –> Layer —-> Crop to selection
step 5
STEP 6 : Now hit Ctrl + C to copy what is left.
STEP 7 : Delete the Layer now by
Left click —-> Layer —-> Delete Layer
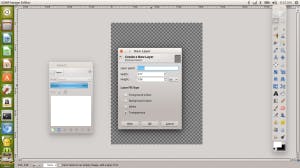
STEP 8 : Create a new Layer :
Left click —> Layer —> New Layer
STEP 9 : Make sure the new layer you are create is set to Transparent
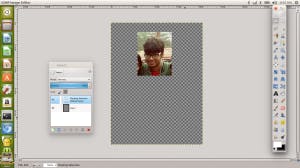
STEP 10 : Hit Ctrl + V
step 10
STEP 11 : Now right click to anchor it to the layer
STEP 12 : Fun begins you have to select and delete the background , to be precise delete everything except your face.
STEP 13 : Use the wand tool to select the same shade area and press Del button to delete the selected area , use Ctrl + Z to undo action .
wand selection
STEP 14 : Use rectangle selection to delete big chunks.
STEP 15 : Use Lasso to select uneven
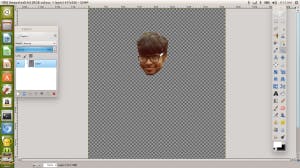
that’s my HG!
area and delete them.
STEP 16 : Voila ! you just created your Hackergotchi , Hit Ctrl + Shift +E and expot it in whichever format you want.
You want to add more steps? Do let me know , if you know a better way of doing it , guide me ! Till then peace out 

