Debugging React Native
I am curious kid on the web, trying to learn more about life and other things. I enjoy building things and my medium of expression is mostly code. I have been dabbling with OpenEdx recently. I love to talk about distributed system, I have taken up learning Rust recently and been writing Python, Golang and JavaScript for a while.
Recently I have been trying to dabble with mobile application development. I wanted to do something on a cross platform domain, so mostly I am being lazy where I wanted to write the application once and make it work for both iOS and Android. I had a choice to choose between Flutter which is a comparatively new framework and React Native which has been here for a while. I ended up choosing React Native and thanks to Geeky Ants for Native Base the development became really easy.
The way I am approaching developing my application is, by a Divide and Conquer strategy, where I have divide the UI part of the application into different component and I am developing one component at a time. I am using StoryBook for achieving the same. This is a beautiful utility which you should check out. Here we can visualise each small component and see how it will render.
While developing this application I was constantly facing the issue of asking myself , “Did this function got called?” or “What is the value of this variable here?”. So going back to my older self I would have put a print statement or as in JavaScript put a console.log on it.(Read it like Beyoncé‘s put a ring on it.)
Having done that for sometime, I asked myself; Is there a better way to this . And the answer is “YES!”, there is always a better way we just need to find out. Now enters the hero of our story, “Debugger” there are various operations that I can perform like to put up break points – conditional and non conditional and analyse our code.
Let me quickly walk you through this, so VS Code has a react native plugin that has to be configured, to use in our project. Once that is done we are almost ready to use it. I faced few issues while getting it to work initially and so I thought having some pointers upfront might ease out the development for other people.
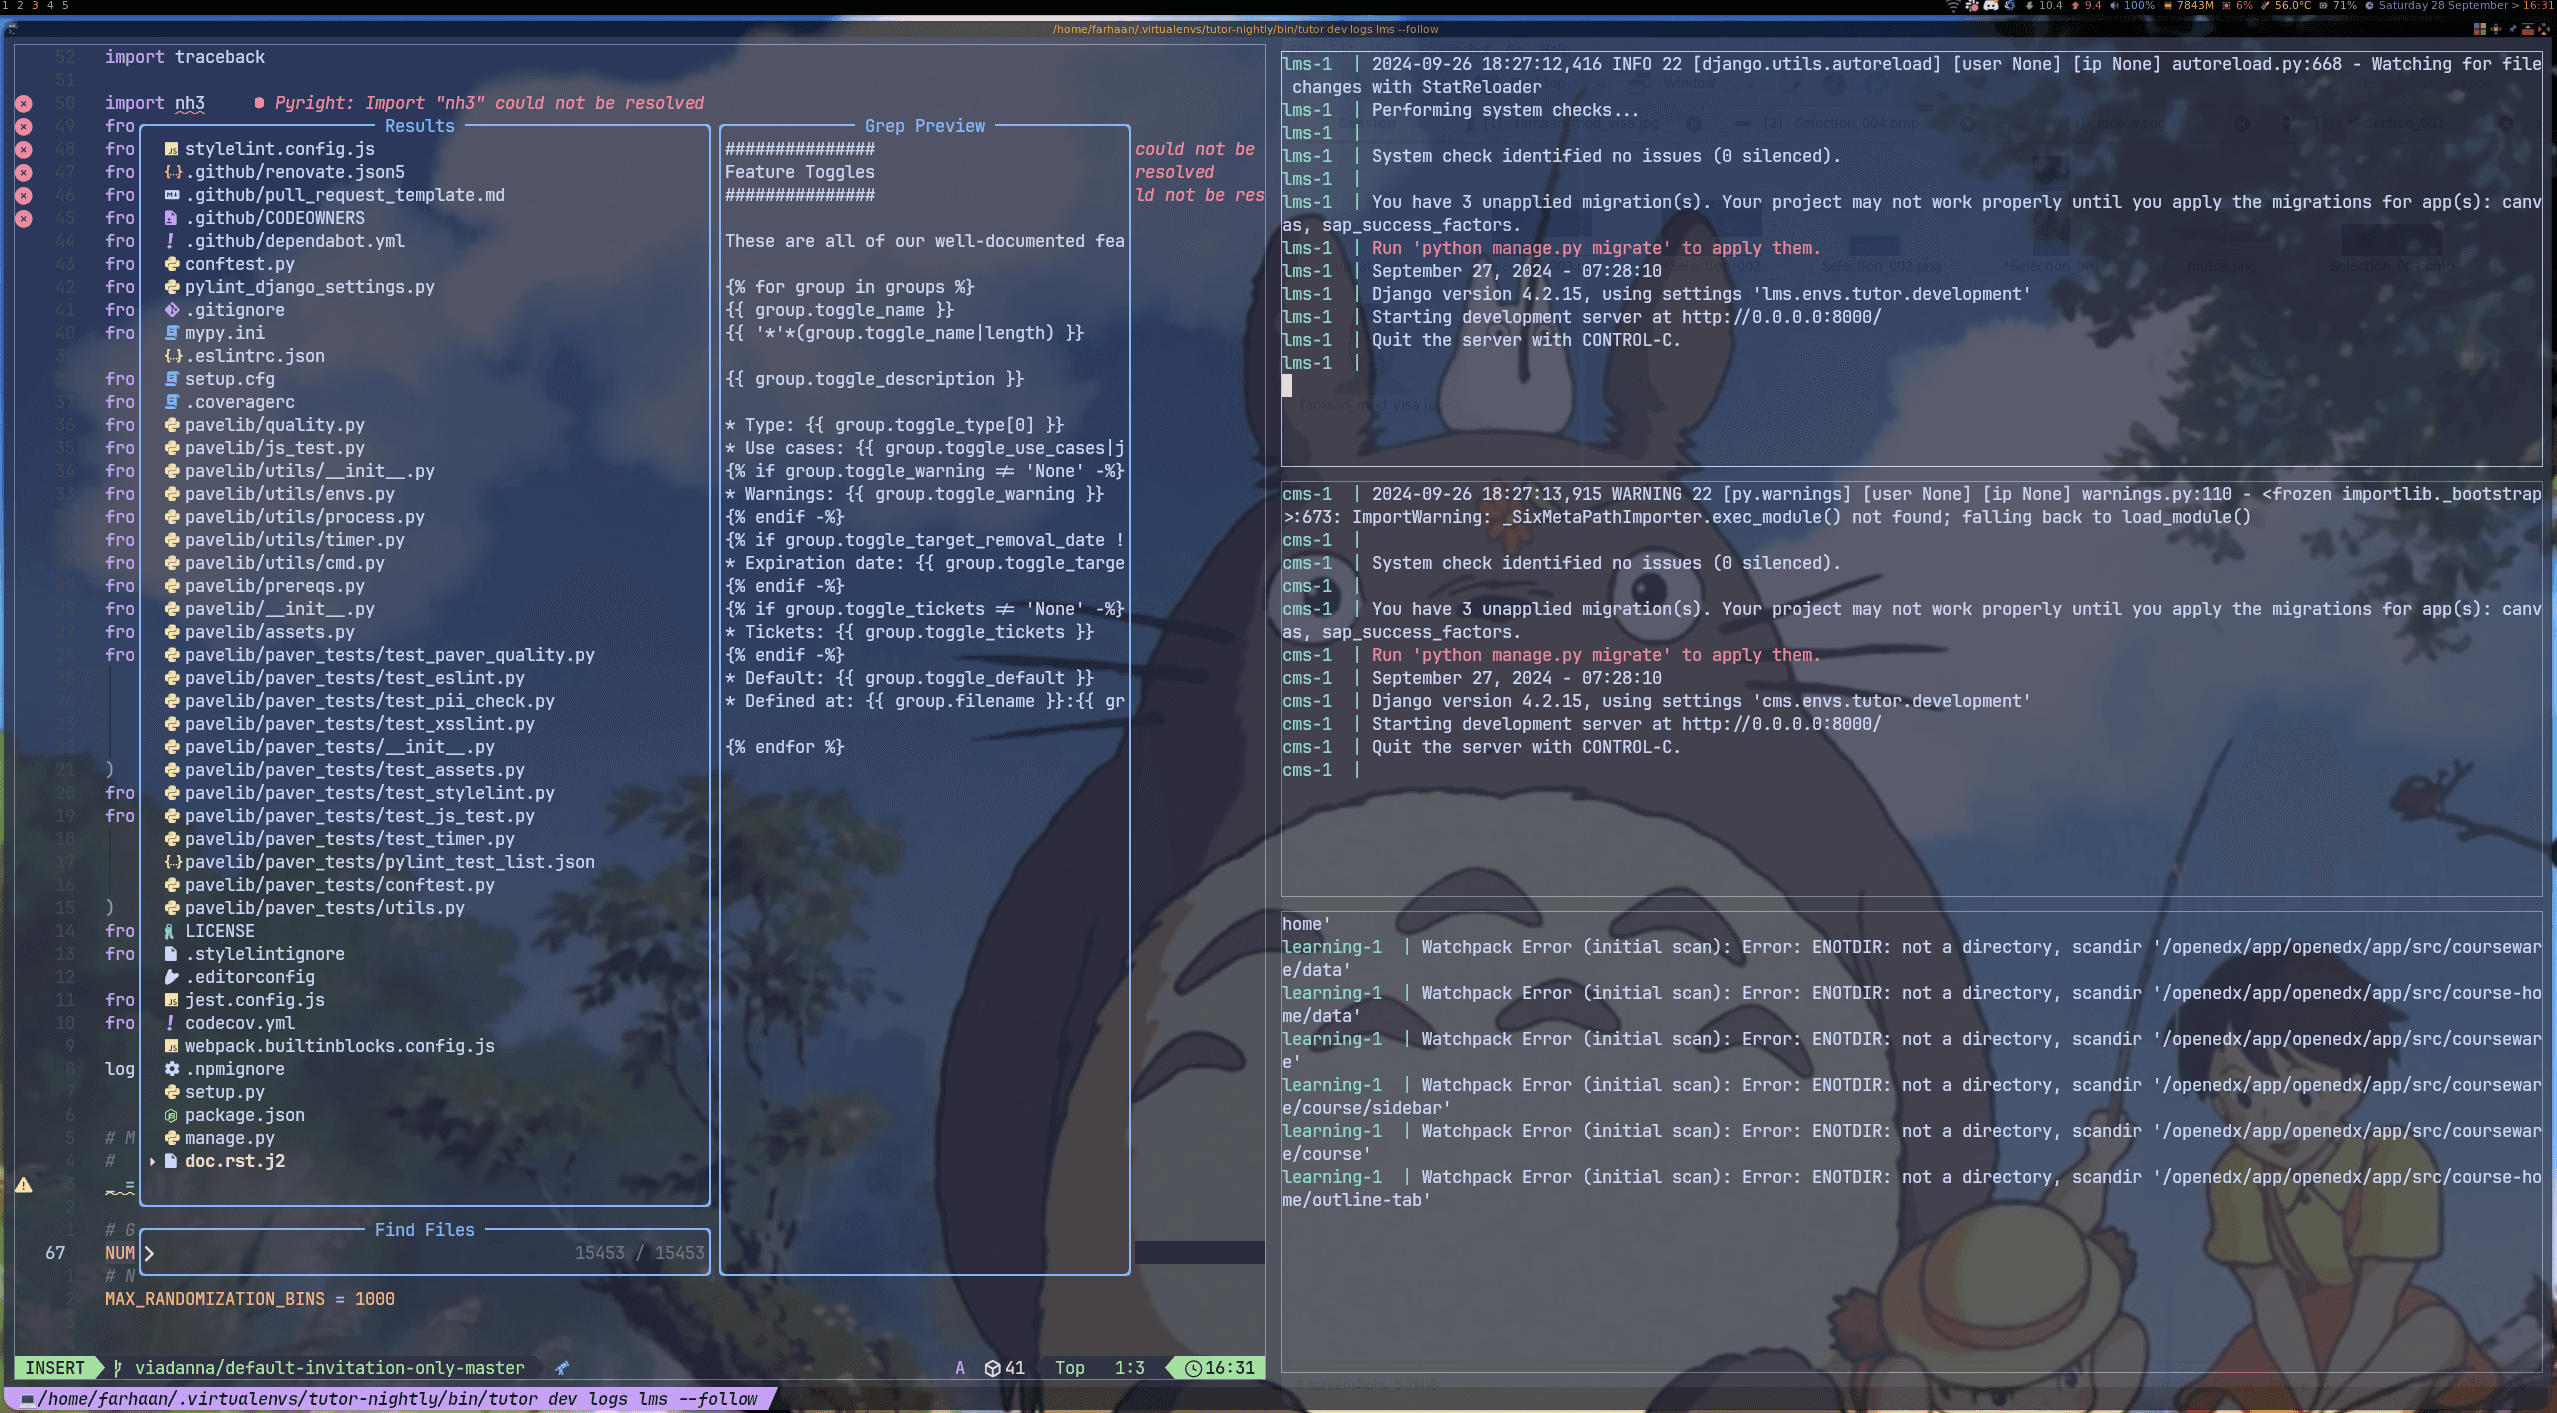
Before I go into deeper details, just a preview of how a debugger looks like on ReactNative with VS Code.
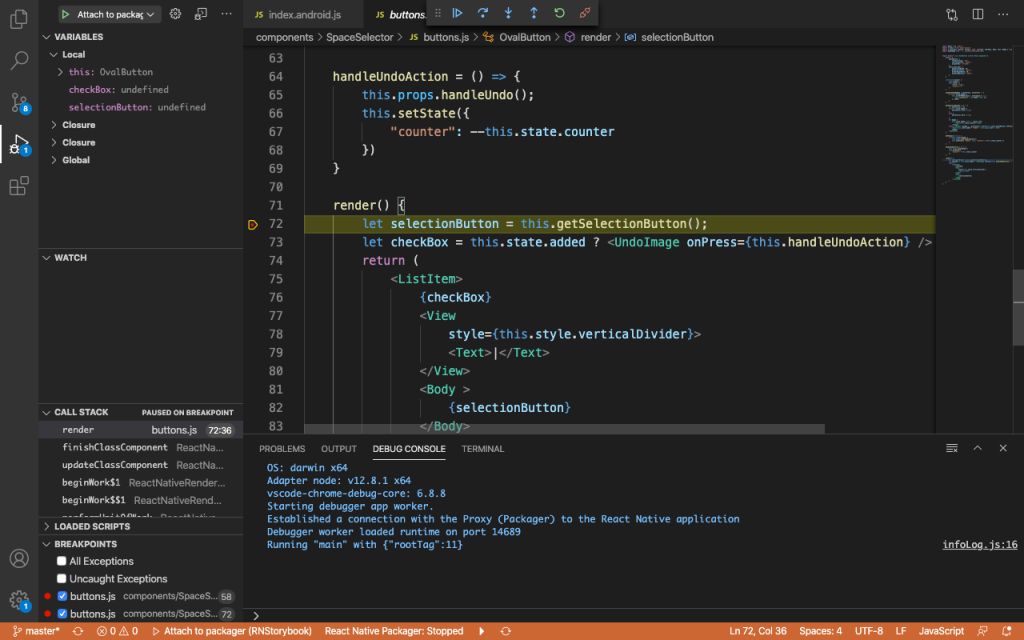
Debugger In Action
So let’s get to the meat of it and how to get it to work. First and foremost we need to download and install React Native Tools from VS Code extensions.
Once that is done we are are good to go, on the side bar you can see that there is a Debug button , when you click on it, VS code opens up a configuration file.

launch.json
There are various options you can play around but the one that worked the best for me was Attach to packager. Once the configuration is in, then we need start the packager, mostly it is done by npm start, but VS Code also provide an option in the action bar at the bottom.

Action Bar
Once the the packager is started we need to start our debugger, click on the Debug button on the sidebar and click on the Attach to packager icon. This will start your debugger from VS Code. Till now your action bar should be of blue color showing that the debugger has started but not active yet.
Then on the device where you are deploying the application you need to enable Debug Js and Vola! your debugger will be active. Debugger has helped me a lot. I could inspect each variable and see at what point of time what values it holds.
Or I can step into debugger and trace the flow of the control statement. I can even put a conditional break point and see when a condition is met or not.
Debuggers has helped me a lot to make my development go faster, hope this blog helps the readers too.
Happy Hacking!